BE PREPARED
ESSENTIALS:
- narcan
- gauze
- band aids
- GET MULTIPLE SIZES! Cuts come in big and small and scrapes can be any shape.
- Make sure to get themed bandaids for those who may be stressed.
- They make waterproof bandages and they're worth getting! Very good at preventing infection when used properly.
- emergency snacks (diabetics, homeless or stranded)
- Anti-septic wipes (clean cuts and scrapes)
- wound wash spray (clean open wounds)
- pads and tampons (never know when someone needs them!)
- tweezers to remove splinters
- neosporin
- chewing gum (relieve stress)
- CPR assistance device
- Mitigates shared germs via mouth to mouth
- You don't have to hold the person's mouth open manually.
- Phone charging bank
- One is great but the more the merrier!
- They make solar powered versions if you're worried about your carbon footprint or forgetting to charge them.
- multiple charging cables
- stuffed animal
- helps manage stress which is useful when someone is having a panic attack or they're nervous.
- cute fren
- never alone!
- Blankets and instant hot coa coa
- emergency cold weather
- stress relief
- Portable generator
- Portable car battery
EXTRAS:
Share this page:


BOOKMARK THIS PAGE AND DOWNLOAD THE GUIDES SO THE INFORMATION IS EASILY ACCESSED LATER!
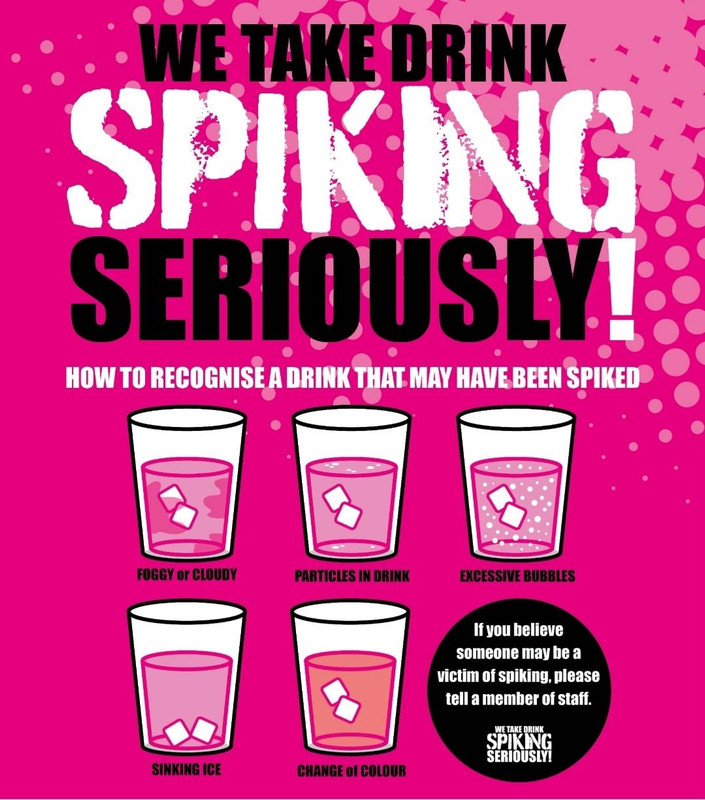
IDENTIFY SPIKED DRINKS

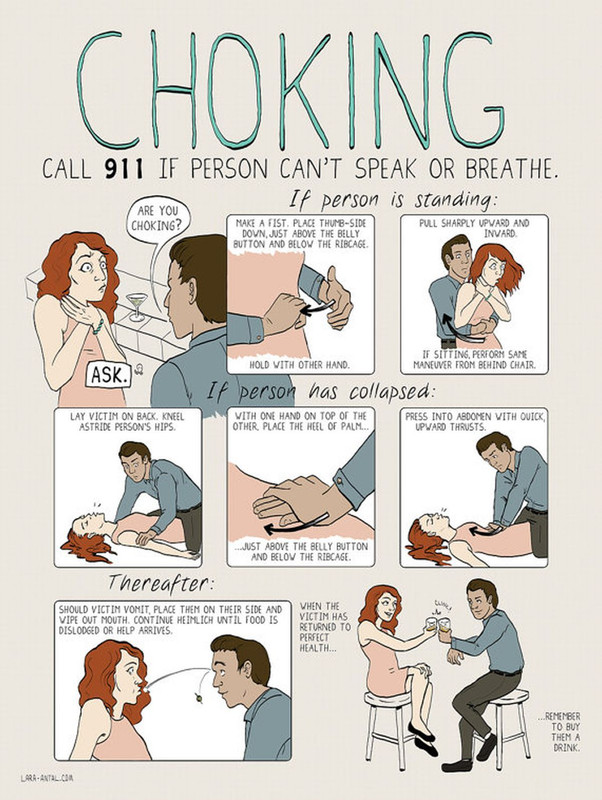
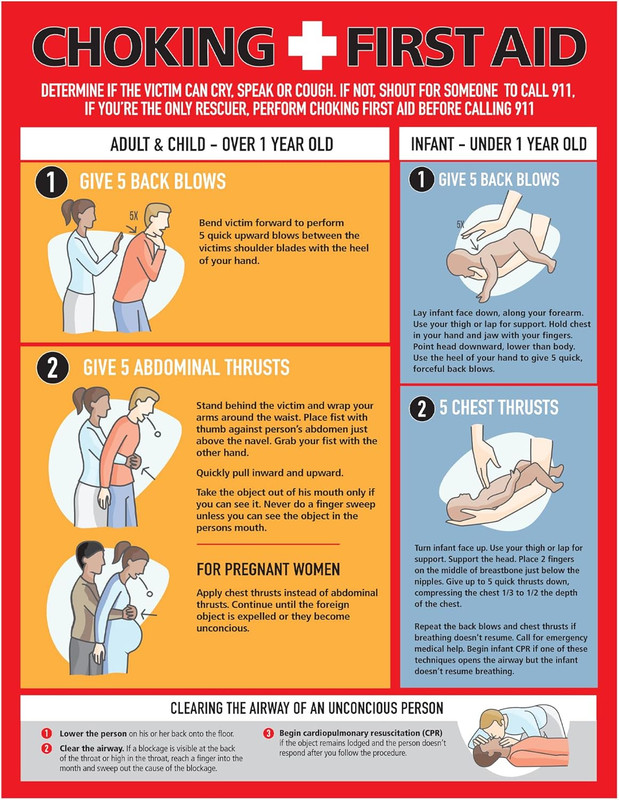
CHOKING AND THE HEIMLICH
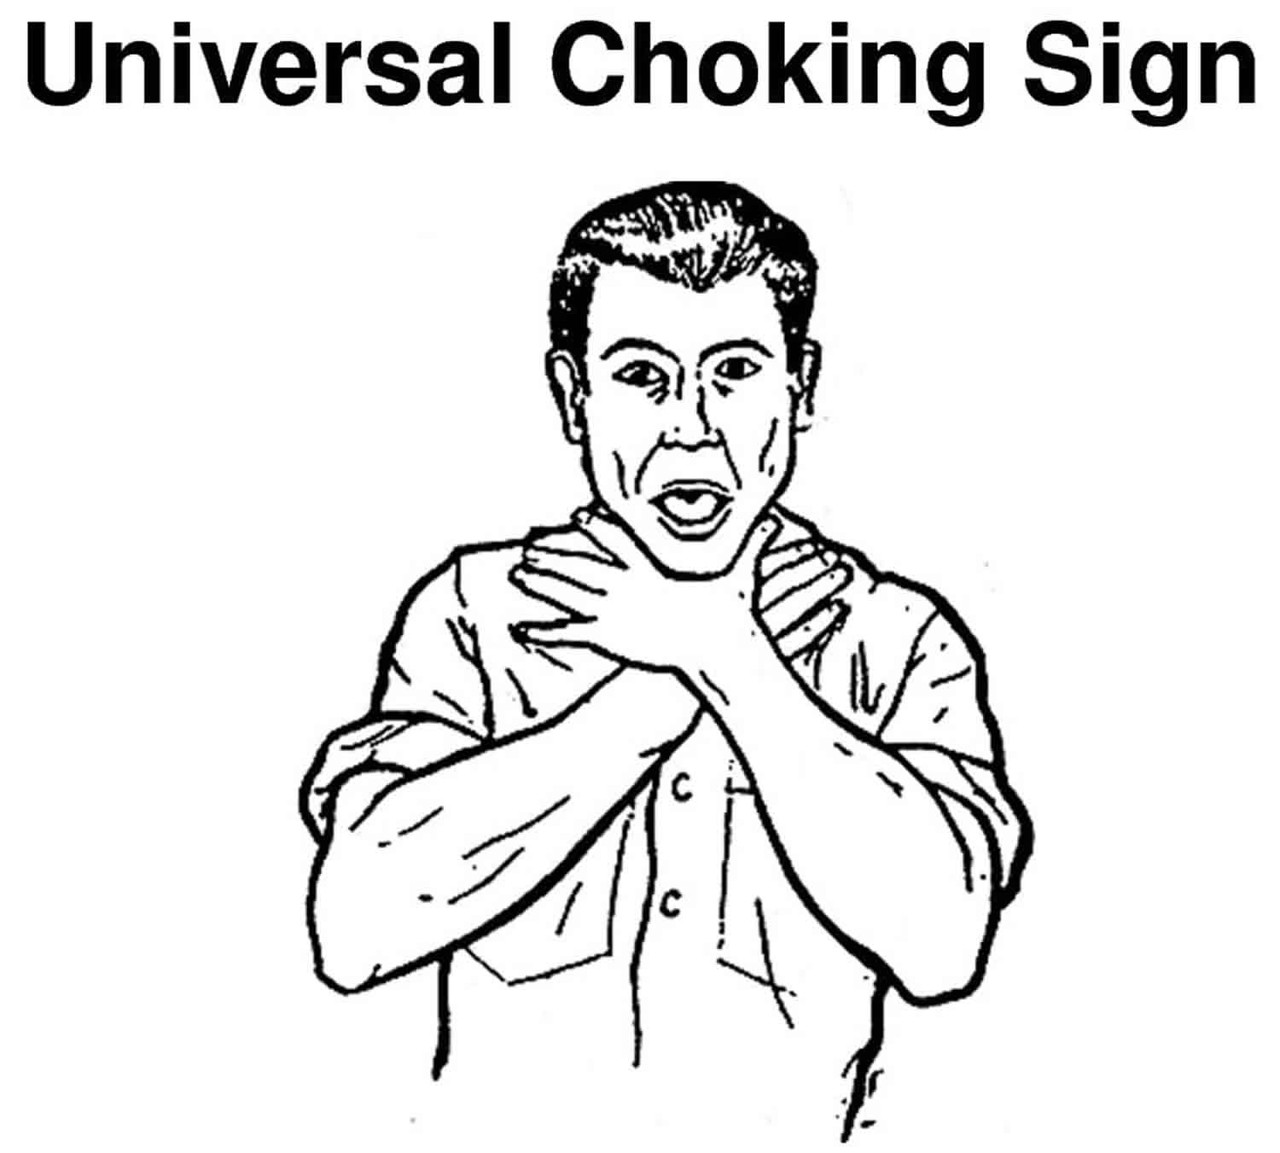
UNIVERSAL CHOKING SIGN
A choking person cannot speak so learning this pose and recognizing it as a call for help can be an important first step to saving a person's life.
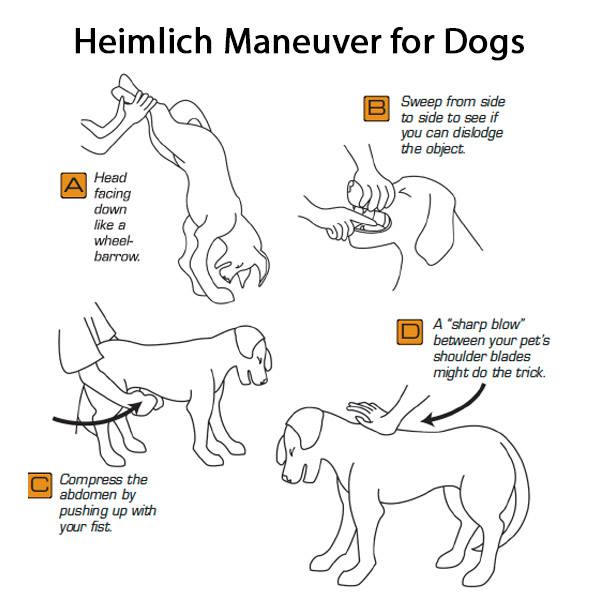
Visual Heimlich Maneuver Guides:
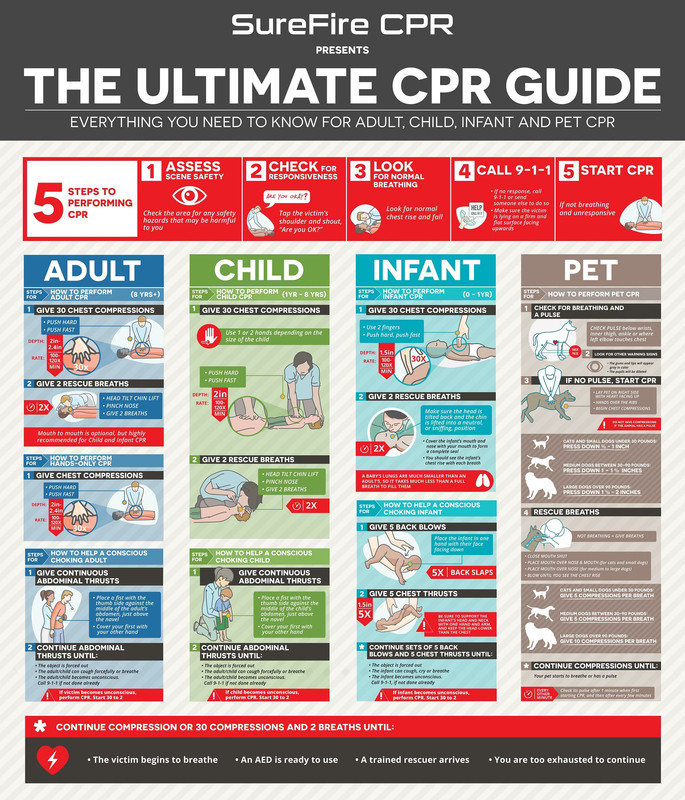
DOING CPR
Free Online CPR and First Aid Training Course
Visual Guides:
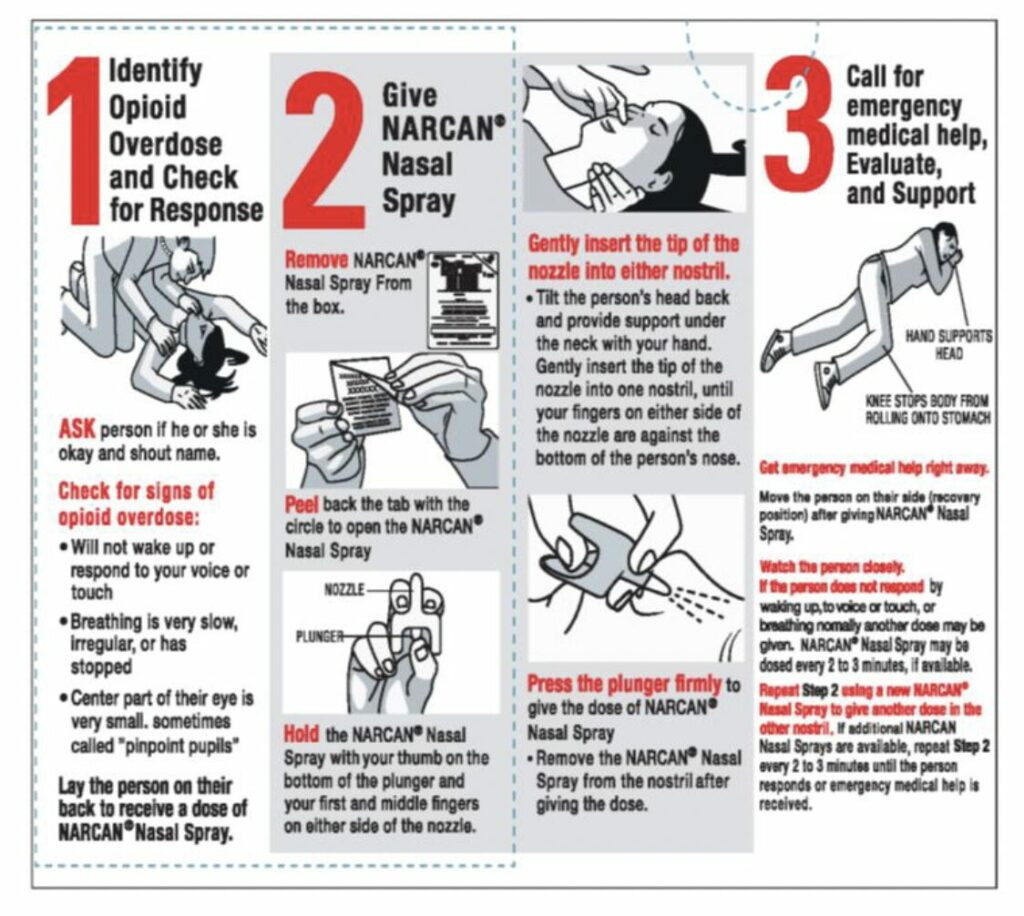
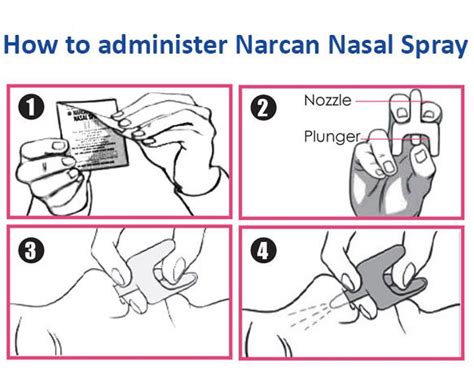
USING NARCAN
Free Online Narcan Training Courses
Visual Guides: